What’s the most dangerous item to have in your kitchen? A razor-sharp knife or a dull knife?
Some of you will go with the former. While that’s definitely the more intuitive answer, a dull knife has bigger chances of cutting through your peripherals because it requires more pressure to cut through food.
This increases its chances of slipping and causing an accident, which means that a safety concerned chef will know when and how to sharpen kitchen knives to ensure they’ll be able to use their fingers for a long time.
Safety should always be the number one priority in a kitchen. This is why we’ve put together a guide that will help you recognize a dull knife, present you with the various options of sharpening you have, and train you to use each one. Your razor-sharp blades await at the end of this article.
Table of contents
How do I know if my knife needs sharpening?
Sometimes you need to follow your intuition. For example, if your kitchen knives never met the abrasive embrace of a sharpening stone, it could be time to sharpen them. Unfortunately, no set interval will tell you how often you need to sharpen your tools.
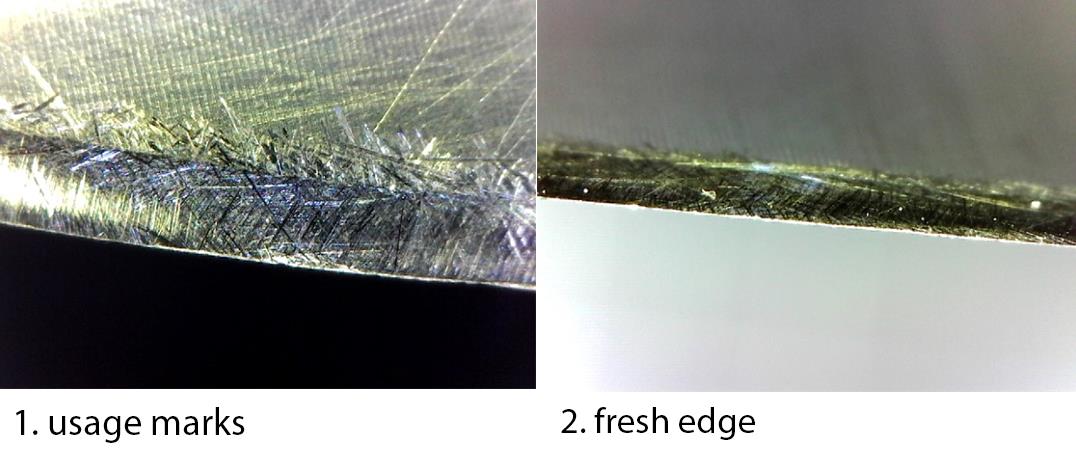
However, there are a few ways to check if your blades are due for some maintenance. The first, and most obvious way, is gently running your finger across the side of the blade. A sharp knife will have a well-defined edge that feels, well, sharp.
If the blade feels a bit rounded and dull, it won’t send shivers down your spine at the thought of touching it with your fingers. In which case, your knife probably needs some attention.
Another way to check if you have dull knives is by trying to cut a sheet of paper. If your kitchen knives can make clean cuts, they are in top condition. Otherwise, if the paper breaks or if the newly formed edges are rugged, it would be a great time to sharpen them.
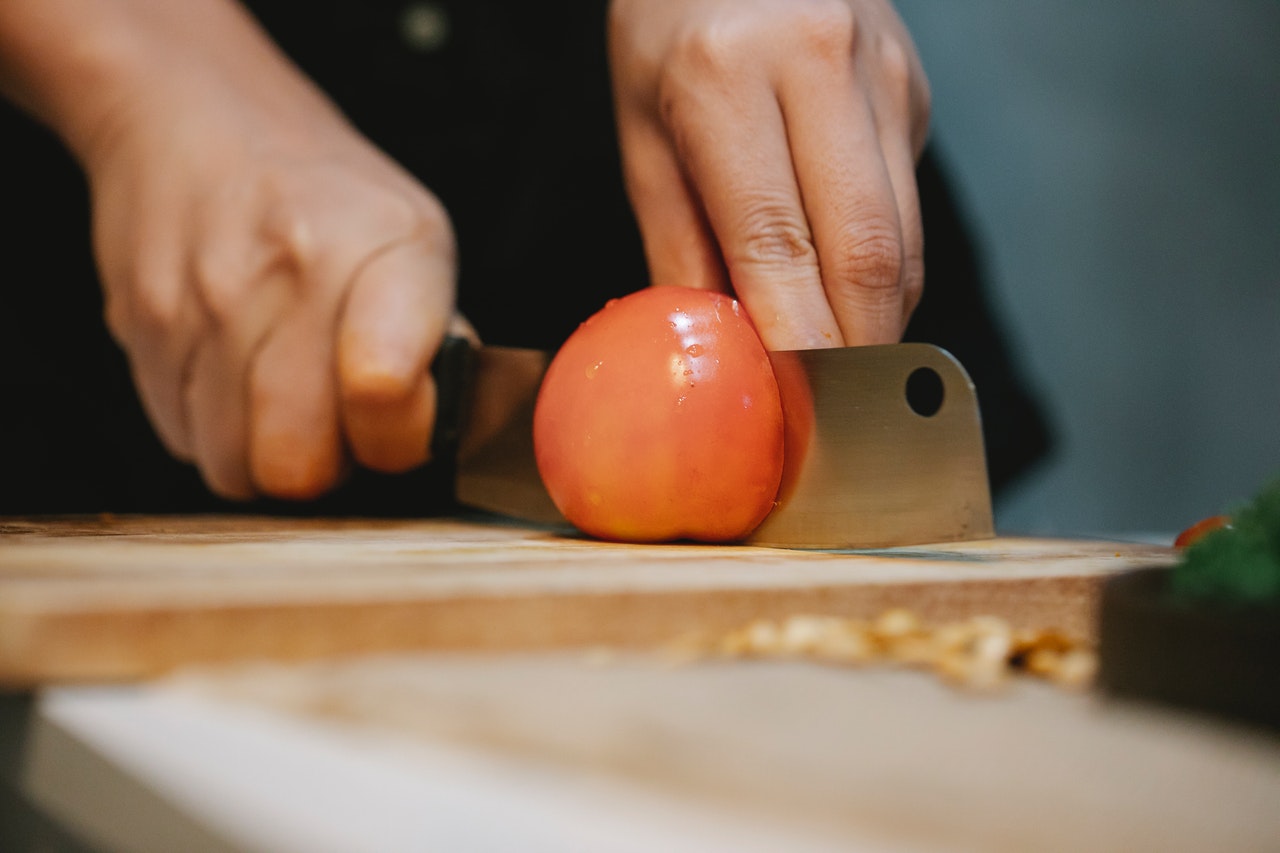
Nevertheless, you won’t probably need to put your knives on the spot like this. You will know if they need sharpening if they slip off onions or if they crush tomatoes rather than easily cut through them.
How to Test Knife Sharpness: 8 Proven Methods
What are the risks of using a dull kitchen knife?
One of the biggest myths out there is that dull knives are safer than sharp ones. The reason why some people believe that is pretty obvious. After all, sharp knives cut through food a lot more easily, which is why many amateur cooks continue to believe that a sharper knife makes them more prone to accidents.
The truth is that using dull knives can lead to many more mistakes, as they require a more significant amount of force to cut through food. This not only increases the risk of slippage, but it also means that if it touches your finger, it will do so with a larger amount of pressure.
Sharp knives, on the other hand, use their geometry to cut. They will easily glide through materials without requiring much force. In the eventuality of it slipping, you’ve got fewer chances of seriously injuring yourself because you were a lot more gentle.
The principle behind this is very simple, but many people still adhere to the myth of dull knives being safer. Thus, it’s better to be properly informed and avoid unnecessary risks. And since your knives will be sharp enough to do some damage if misused, you’ll be a lot more careful handling them in the first place.
What are the differences between honing and sharpening?
If you’ve been looking for the proper way to sharpen a kitchen knife, you might have heard about honing. Honing and sharpening are sometimes used interchangeably, but there’s a significant difference you should keep in mind. You will need to consider both operations, depending on the occasion.
A kitchen knife will lose its cutting power if its sharp edge becomes worn down with use or if it was misaligned due to excessive pressure. Wearing the blade down will usually take some time, but pushing it out of alignment can (and does) happen very frequently.
Honing
The process of honing a knife should be regular maintenance for knives that are already sharp. It entails pushing the sharp edge against a honing steel until it is perfectly aligned again. To keep your knives in top condition, it is highly advisable to do this regularly.
Some people prefer to hone their knives after every use, which ensures their knives will only need minimal sharpening, about twice a year. However, honing them once in a while is more than enough for the average home cook, especially if you want to reduce the time spent in the kitchen.
Sharpening
You should consider sharpening when your knives’ edges are worn down. If you’ve been using them for a while and they lost their bite, they probably need a fresh new edge.
To do so, you will need to grind the side of the edge against a sharpening stone.
This removes material from the blade to reveal a finer, tapering edge that will keep your fingers safe and your food evenly cooked.
Handpicked for you
True cutting power in the palm of your hand
How to hone a knife with a honing steel?
When you’re ready to give your knife a new life, you should look for a good quality honing steel. You should opt for a heavier model that’s at least 9-inches long. The standard honing steel is made of a steel rod with tiny ridges along its length.

You will need to hold the steel by its rubber handle and point it downwards, pressing on an adherent surface, like a wooden cutting board. Keep your knife in your dominant hand and place its heel at the top of the steel rod. Touch the steel with the knife’s edge by rotating it at a 15 degrees angle.
Glide the edge lightly against the steel by pulling the knife towards yourself and down the honing rod. You should finish the movement with the tip of the blade touching the tip of the honing steel. Switch sides and repeat the motion a few times. You will need about eight alternate strokes per side.
Why and How to Hone a Knife?
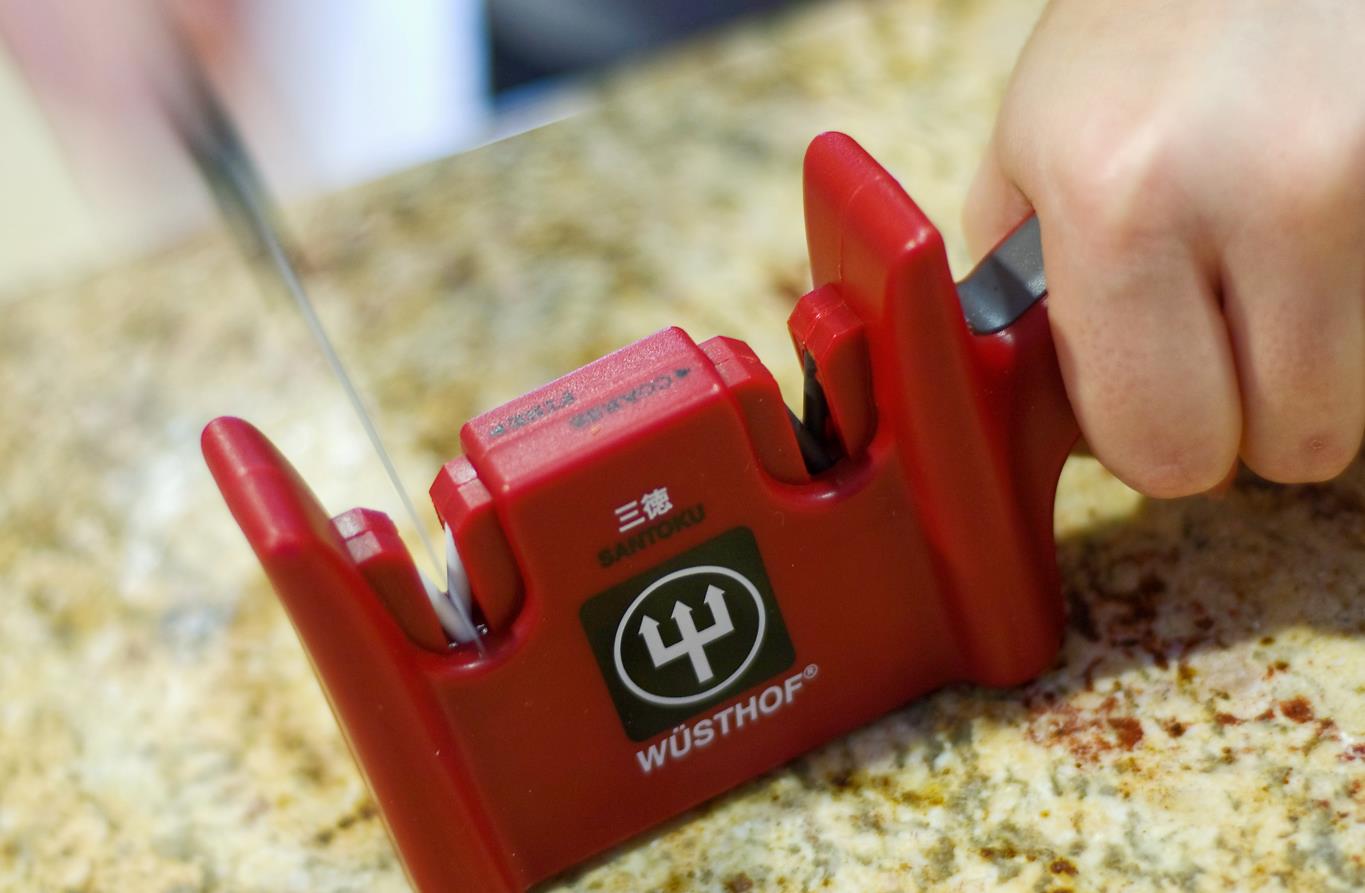
How to sharpen kitchen knives with a manual sharpener?
A handheld sharpener is a compact device you can whip out anytime you feel your knives could benefit from some new teeth. It features a rubber or plastic handle and two slots through which you can pull your blade.
The first one is a coarse grit that removes material from the blade to gently taper it, while the second one is a fine grit for polishing. If this is your first time attempting to be a ninja, you might need a couple of tries until you get it right.
Pros
- They come in a broad range of models, and they’re easy to find online or in stores.
- They are the cheapest way to keep your sharps in top condition.
- They are small and effortless to clean up and store.
- They give you complete control over the angle at which you sharpen your blades.
- They are highly portable, which allows you to sharpen knives on the go. BBQ, anyone?
Cons
- They require more effort than electric sharpeners.
- They take more time to sharpen properly.
- They don’t work on waved edge or serrated knives.
Is this your pick? Great! Let’s sharpen those bad boys.
The process is quite intuitive. First, take the protective case off the sharpener (if it has one) and submerge the device in a little bit of water to get the gritty wheels wet. This will prevent them from getting too hot.
Keep the sharpener firmly planted on the counter and place the blade’s heel into the coarse slot. You can then pull it through towards yourself, applying very light pressure. Next, pull it through three to six times on each side, pressing it evenly against the wheels from the heel to the tip.
When ready, wash off the metal residue and pull it through the polishing slot a couple of times.
How to Use a Knife Sharpener: Bring Back the Life in Your Knife
Sharpener vs. whetstone
Before we dive right into using a whetstone to sharpen your beloved kitchen knives, let’s see how they compare to sharpeners.
Whether you use a sharpener or whetstone, they will make your knives sharper. One is a fast way to get there; the other requires more elbow grease.
Some sharpeners sharpen the edge the same as honing rods do. Some have ceramic or diamond slots inside that wear material from the edge. These sharpeners work as a combination of a honing rod and whetstone but controlling the sharpening angle is difficult.
Whetstones sharpen knives by removing material from the edge to expose a new surface. It essentially gives the blade a factory reset.
Whetstone vs Sharpener: Which One Is a Better Tool and Why?
How to sharpen your kitchen knives with a whetstone?
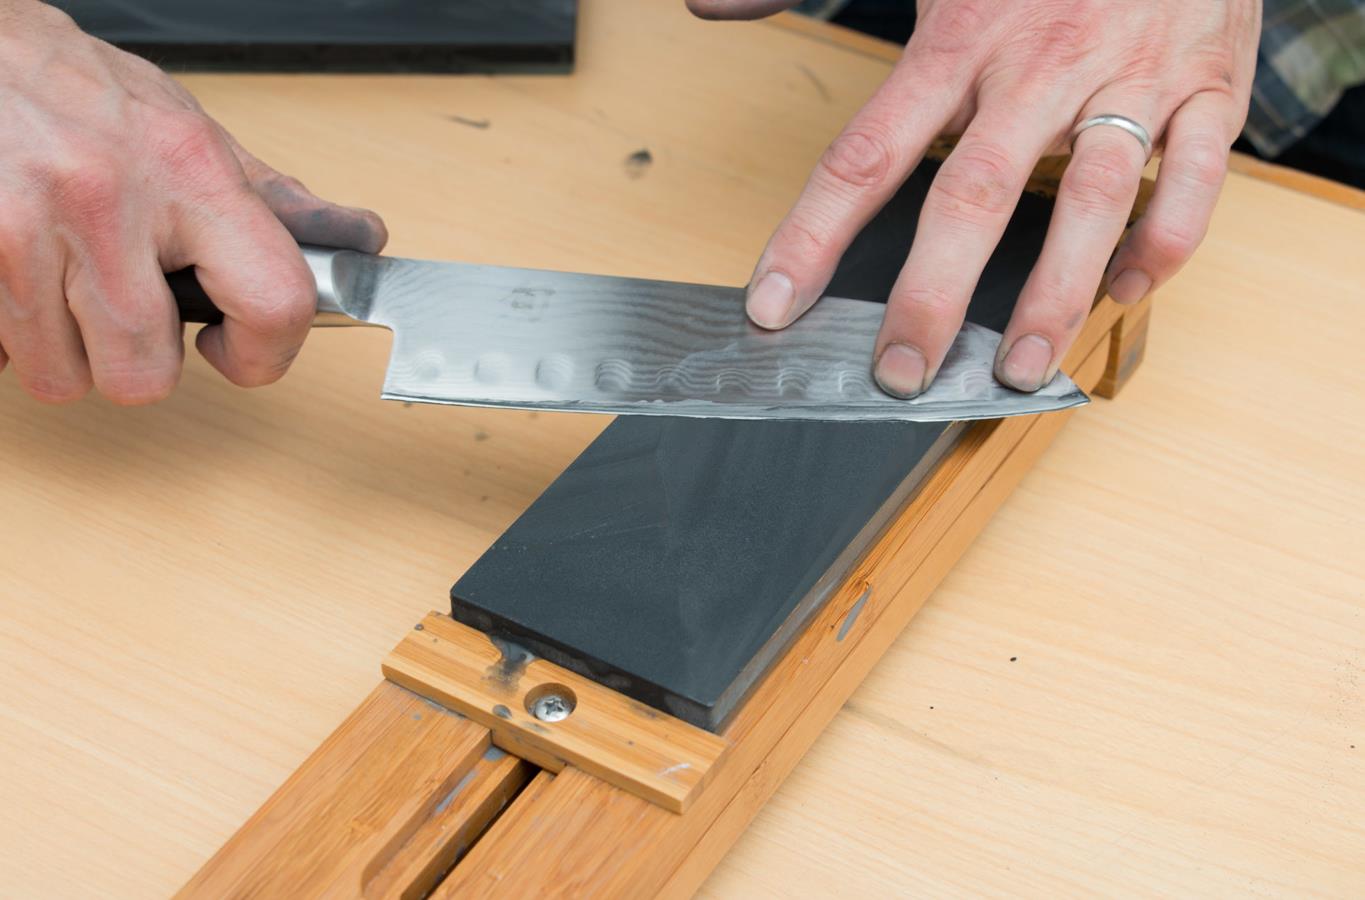
Whetstones, or sharpening stones, are a knife’s true best friend. Bringing back the sharpness of a dull blade with a whetstone is the best way to go about it.
What Is a Whetstone and How to Use One?
There’s only one way to turn a knife sharpening ninja into a Hokage, and that is learning how to use a whetstone. They require more effort and technique than the alternatives, but it’s not really rocket science. This is probably the best way to sharpen kitchen knives, as it replicates the manufacturing process.
Whetstone grit
The whetstone grits are similar to those of sandpapers. The higher the number, the finer it is. The lower grit surface is for the initial sharpening. It removes the most material from the edge. However, since it’s coarser, it raises metal from the opposite side, creating what we call the burr.
The higher grit side removes the burr and polishes the blade. So when sharpening a knife, you start with the coarse side and follow up with the other side to finish sharpening.
What’s Whetstone Grit and How to Choose?
Whetstone material
Most standard whetstones are made with silicon carbide, aluminum oxide, or novaculite.
There are also diamond sharpening stones. They are the coarsest – usually used for sharpening knives with incredible wear resistance. However, these are very coarse that can give the knife chips rather than sharpening it. That said, diamond sharpening stones are best for professional use and specific blades.
The whetstones made from aluminum oxide and silicon carbide require water as a lubricant. Sharpeners often refer to these whetstones as water stones. Although the term “whetstone” may be confusing, not all whetstones are water stones, but all water stones are whetstones.
Novaculite is the standard material for oil stones, which – as expected – needs oil to lubricate the surface.
If you have a whetstone but don’t know if you need to use water or oil, take a look at the surface. Water stones are porous with a smooth texture, while oil stones have a rough surface. If this isn’t enough to tell, it’s best to check the packaging.
How to Tell If Sharpening Stone Is Oil or Water
Pros
- They give you complete control over the result.
- They come with a very low risk of damaging your blades (unless you don’t know what you’re doing).
- They are tiny, light and portable.
- They work for a wide variety of knives, including kitchen shears. You can even use them for your gardening tools.
Cons
- They are a poor option for beginners, as there are no guides to hold the blade.
- They require a lot more time and effort than their counterparts.
- High-quality whetstones can be quite expensive.
Before buying a whetstone, you’ll need to learn what’s the proper way to sharpen a kitchen knife with this blocky fellow. You’d think a slab of stone would come with fewer instructions than an electrical appliance, but a sharpening stone is an exception to that rule.
Before we’re going to test your sharpening method, we need to prepare the stage. First, soak your whetstone in lukewarm water for a few minutes until you can’t see any more air bubbles. Next, you will need to place it coarse side up, on the counter, or on a cutting board.
Most kitchen knives require a 20-degree angle, while some Japanese knives should be sharpened at a 15-degree angle. You can check with your knife’s manufacturer if you aren’t sure. The science behind is fascinating。
Discover the Best Angle to Sharpen a Knife
Once you’re ready to sharpen, place the blade at the correct angle, facing away from you.
Grip the handle firmly with your dominant hand, and use the other one to apply pressure on the flat side of the blade. Starting at the heel, drag the edge down the stone towards the tip. At the same time, slowly pull the knife towards you. Glide the edge against the stone in a circular motion several times until you can see metal residue forming near the blade.
Repeat the same steps for the other side of the blade when you can see metal specks covering the entire length. When finished, turn the stone over and polish the knife.
I bet you’re already on the verge of buying new kitchen knives. Don’t worry, we’ve wrote a more detailed guide on the proess. It’s a lot easier than it sounds.
How to Use a Sharpening Stone or Whetstone
How can you tell when your knife is sharp enough?
The intimidating sheen of a properly sharpened knife should be enough to let you know you’re finished. However, if you’re not sure when to stop, there are a few ways in which you can put your work to the test.
The paper method works very well and is easy to use throughout the sharpening process. Keep a few pieces of paper nearby and check your edges once in a while to make sure you’re not sharpening your knives into oblivion.
You can also test them with your fingernail, but you’ll have to be careful. Gently tap the edge against one of your fingernails to see if it bites in ever so slightly. If it does, then your knife is sharp enough. Blades that are still dull will usually slide or deflect.
Advanced sharpening skills
Let’s take everything you’ve learned a step further. Here is how you can sharpen specific types of knives and DIY methods when you’re missing a sharpener.
How to sharpen a serrated knife
Like all knives, serrated knives lose their sharpness overtime. The challenge with sharpening serrated knives is you can’t use a whetstone. The cutting edge won’t make full contact with the surface. Your best helper is a honing rod or a rat tail sharpener made from a hard material like ceramic.
There’s a specific technique to sharpening serrated knives that you must take time to practice.
How to Sharpen a Serrated Knife: All You Need to Know
How to sharpen a single bevel knife
Many specialized Japanese kitchen knives have a single bevel, meaning they are ground only on one side. Knives like Yanagiba and Deba are more likely to adept such a design. .
When sharpening such knives, there is less work to do as you’ll need to sharpen the ground side. How you’ll sharpen it is essentially the same as any other knife. Prepare your whetstone and start stroking the blade, but pay attention to the sharpening angle, which can get tricky with single bevel knives.
It’s best to stick with whetstones when sharpening a single bevel kitchen knife, sharpeners don’t work with single bevel knives as they are dual-sided.
How to Sharpen a Single Bevel Knife?
How to sharpen a ceramic knife
First and foremost, congratulations if you have a dull ceramic knife. It means you’ve gotten so much use out of it over many months – potentially years.
Everything we’ve discussed so far doesn’t apply to ceramic knives. You can’t sharpen them using a traditional whetstone. Only a diamond sharpening stone or file will make it sharper.
However, you must sharpen them carefully. Even under very little stress, the ceramic cutting edge can chip, leading to a broken knife. If you haven’t sharpened one before, we suggest looking for a new one or letting a professional sharpener do it.
A ceramic knife won’t form a burr – more on this topic below, so it will be difficult to know when to flip the knife. Count the number of strokes and do the same for the other side. Otherwise, you’ll have an asymmetrical edge that steers towards one direction, giving you inconsistent cuts.
How to Sharpen a Ceramic Knife?
How to sharpen a knife without a sharpener
In the absence of a sharpener, you can use household items or things you would never guess to sharpen up a knife, like a shovel or your car’s window. Before you read those from the article we’ve put together, let’s not go too far from our kitchen. Here’s how you can use a ceramic mug to sharpen a knife as an example.
- Put a dry towel or something nonslip on your countertop and place the mug upside down.
- Hold the knife and the mug firmly and rub the edge on the raw ceramic part, covering from heel to tip in one stroke.
- Repeat this process for both sides. If you see the bottom of the mug getting darker, it’s a good sign! That means your knife is getting sharper.
This sharpening trick only works with mugs with an exposed ceramic part at the bottom. If the acrylic enamel paint covers the entire mug, look for one with a raw edge. There are many other household remedies to quickly give your knives a sharp edge.
How to Sharpen a Knife Without a Sharpener (DIY)
How to dull a knife
Sometimes, you need to do the opposite. Whatever the reasons, here is how you dull a knife – likely quicker than sharpening one.
The same as sharpening a knife, there are many ways to dull it. You can use the same whetstone you would use to sharpen a knife but do it incorrectly. Holding the knife at a steeper angle and rubbing it back and forth will dull it fast.
Yet, this will damage the whetstone. Instead, utilize the numerous methods we’ve listed on our corresponding article to dull a knife without damaging it.
How to Dull a Knife?
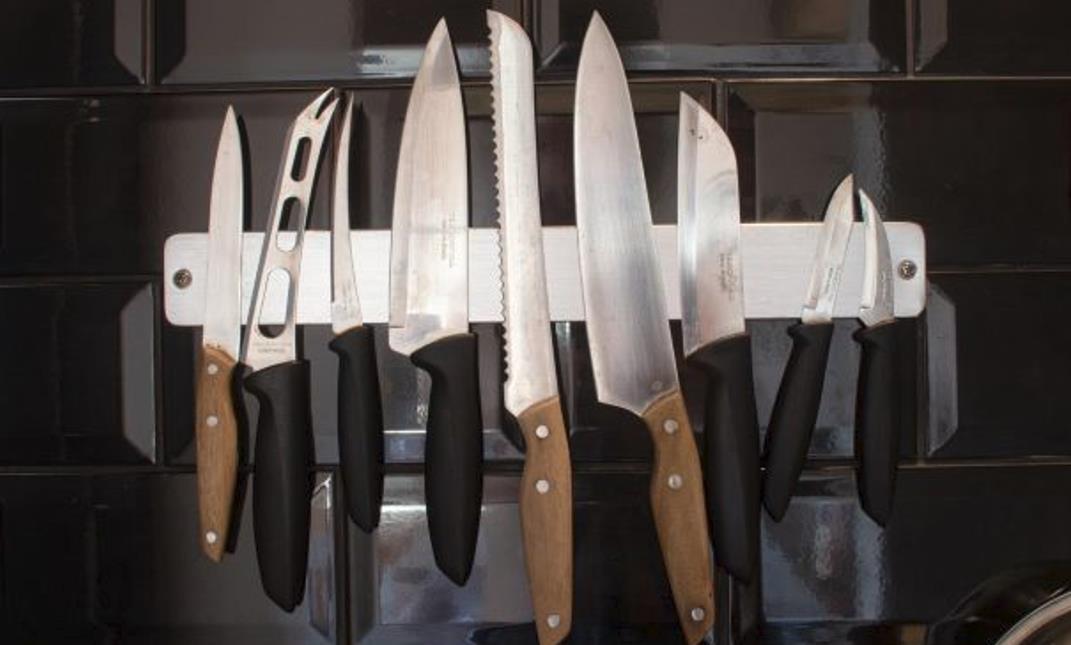
How can you store your knives to keep them sharp for longer?
When you put some effort into keeping your knives pristine, you’ll start caring about how they’re stored a lot more. There’s nothing worse than your work going to waste, and improper storage can do a lot of damage to otherwise perfect knives.
Depending on your lifestyle, there are a few great ways to store them. If you have small kids or pets, your safest bet is to put them in a drawer. There are drawer inserts you can buy that will ensure they won’t rub against other utensils. You should opt for wooden ones, as they will remove excess moisture and prevent your tools from rusting.
Another great way to store them is on your wall. You can buy a special magnetic strip that you mount on one of your walls, then snap your knives to it. This is a great storage solution because there’s no friction involved. Plus, you’ll be able to see them all at a glance.
Lastly, countertop blocks are great, as long as they are made of wood and feature horizontal slots. Make sure the slots have a little bit of extra room so that the tips of your knives don’t touch anything when inserted.
Final words
With great power comes great responsibility. Once you’ve been initiated on sharpening your knives the ninja way, you must use your knowledge wisely. There is no going back to cutting food with a dull knife once you’ve learned the danger it entails.
Luckily, you’re now equipped with everything you need to know to keep your blades in top condition. All you need for proper maintenance are a couple of small accessories and a half-hour twice a year. Not only will this keep you safe in your own kitchen, but it will also increase the life of your tools by a significant margin.
A sharp knife is a chef’s most important sidekick, so make sure you give yours enough attention. They will reward you with better meals and an enhanced cooking experience.
Lastly, a benefit you don’t want to miss is the possibility of going to your friends’ houses and saying: “wow, you haven’t sharpened these knives in a long time.” Petty? Yes. But they won’t mind once you show them how it’s done.