Anyone who owns a good quality knife wants to look after that investment. We want get high performance and longevity out it as an everyday kitchen tool.
Understanding what a knife burr is and how to work with it for best knife performance is what this article is all about.
A knife burr is the very thin shaving or excess of metal. It is made when you sharpen a knife blade. It’s the part that you need to raise off the knife blade edge surface and then hone off get a razor – sharp edge to those beautiful knives of yours!
Obviously, you only create a knife burr during the knife sharpening process, but we’ll get to that later. Firstly, here’s how to identify a knife burr on your knife blade.
Table of contents
How to check for a knife burr on your knife blade
Right. So, you’re in the process of sharpening your knife blade and you want to find the burr to remove it and make the blade entirely smooth and free of waste metal.
The burr is a shaving of metal, very fine and difficult to spot just with the naked eye, so you need your fingers here, but be careful!
Here’s how:
- Hold the knife securely by the handle in one hand, preferably with your wrist resting steady on a solid surface like a countertop.
- Put your free hand’s thumb on the side of the knife blade that is opposite to the side of the blade that was in contact with the sharpening surface. So, if you sharpened the right side of the blade, your thumb will be on the left side of the blade and vice versa.
- Moving down the knife blade from the tip to the handle end, gently push your thumb along and down the blade surface vertically, so that your thumb is sliding off the edge of the blade in each smooth movement.
- Ensure that your thumb is 90 degrees to the edge of the knife blade, never move across the blade edge or you’ll cut yourself.
- The burr is a sliver or wire of metal that will stick out from the surrounding smooth blade surface, you’ll feel it catch on the skin of your thumb as you move over it.
- Continue going along the length of the blade in vertical movements, moving slowly and carefully, and identify all the spots on the knife blade that have catchy areas or burrs.
- If your knife blade has adequate amount of burrs along its edge, that means the knife is getting sharpened, you did a good job.
- If you can’t feel any burrs at all on the knife blade edge, this means that either you need to sharpen the knife at a higher angle, or that you just haven’t sharpened enough. In that case, you need to continue for another couple of strokes on each side of the blade edge.
If this tactile method of locating the burred areas on your knife blade edge doesn’t rock your boat, there are other options. We can recommend an LED magnifier as a nifty tool if you’re into gadgets. A simple magnifying glass in a well – lit area would also work.
How to raise a knife burr on your knife blade
To raise a burr on your kitchen knife, it’s essential that you’re sharpening the knife blade at the right angle.
As you sharpen by either pushing your knife blade across a sharpener (like a whetstone) or by pulling a knife sharpener across the knife blade, a burr will be created because the shaved off steel will be pushed out to the end of the edge bevel or very end of the knife’s edge surface.
As we said before, you can feel for the burrs by doing the thumb test or spot them visually by using a magnifying device.
To raise a burr(s) effectively, you should:
- Sharpen your knife blade on one side for 5 strokes
- Feel that a burr is developing with your thumb
- Switch to the other side of the blade and sharpen for another 5 strokes on that side
- Continue sharpening until you can feel an even and consistent burr along the whole length of the knife edge
- Once that even burr is identified, flip over to the opposite side of the blade for the final sharpening and count another 5 strokes
When sharpening a knife blade, it’s important to remove the same amount of discard metal from the blade on either side, that’s why you need to give the same amount of sharpening motions on each side of the blade. This will hone the blade smoothly and give a sharp edge without the blade being uneven.
At this point your knife will be sharpened but not polished, so you need to move onto a finer grit polishing surface and proceed, again using the same number of strokes on each side of the blade to remove the burr and get a smooth finish. A fine grit of 3 000 or higher is usually recommended at this stage of the knife sharpening process.
Handpicked for you
True cutting power in the palm of your hand
Why is raising a burr important when I’m sharpening my knives?
Raising a burr is important because it shows you that you’re sharpening the blade, that you’re lifting off excess metal to then be smoothed down and off to provide that extra sharp edge.
No burr means that you’re not sharpening properly, you’re either using the wrong sharpening implement, you’re sharpening at the wrong angle, or your technique is off.
The burr is essentially a green light on your sharpening process, it tells you you’re doing it right and you’re honing the blade without damaging it or being ineffectual.
The next step – removing the knife burr
As we discussed earlier, honing is the process of removing the knife burr and smoothing the surface of the blade and you can do this by moving onto a finer grit sharpening surface after your initial sharpening strokes.
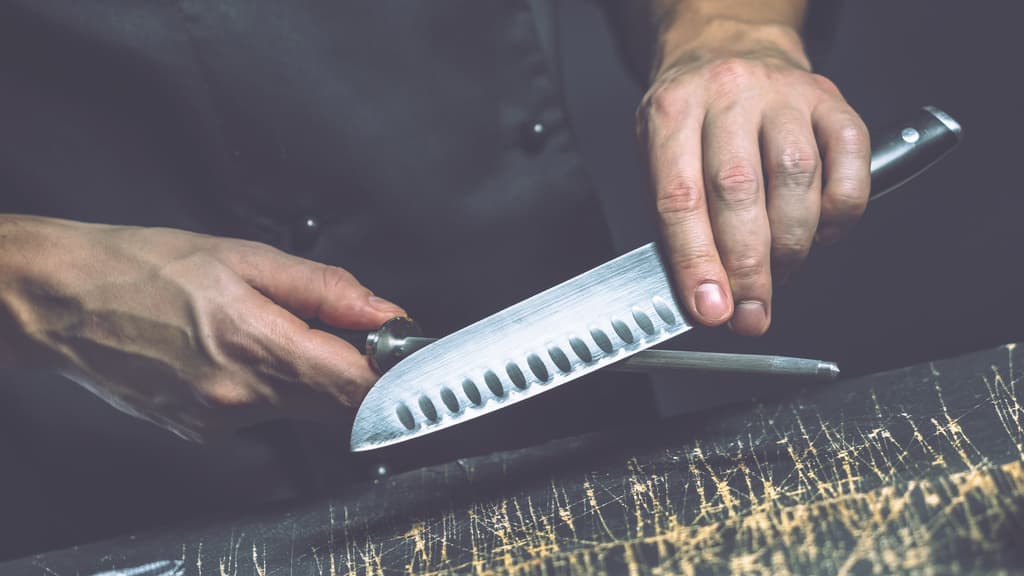
Another good way to remove the knife burr is to use a honing rod or honing steel. Here’s how:
- Your knife has been initially sharpened, usually 5 strokes on each side, we’re now going to hone, which is essentially refining the sharpening.
- Hold the honing rod in front of you, across your body at chest level, in your non – dominant hand.
- Now in smooth, even strokes, sweep the knife blade edge down the honing rod, moving from the tip end of the honing rod to the handle end.
- Continue these sweeping motions, working along the knife blade edge from the heel (bottom) of the blade until you reach the tip or end of the blade. Maintain a suitable honing angle throughout for best results.
- The right honing angle is crucial because it will keep the spine of the knife positioned behind the cutting edge as you work. This is effective honing.
- After honing the blade, wipe the blade down with a dry cloth to remove any metal debris.
Honing rod/steel FAQs
How do I choose a good quality honing rod?
Choosing a honing steel is impacted by the purpose you need it for. If you are looking for a steel for your regular honing sessions, you should go with stainless steel ones. If you’d like to shorten your trips to the knife sharpener, you might want to buy a ceramic or a diamond one.
How often will I need to replace my honing rod?
If you’re using it frequently, a honing rod will last you between 5 to 10 years. With infrequent usage, you can expect it to last you a decade or more with ease.
How do I care for my honing rod?
Clean it after every use by wiping it down with a dry cloth. If it came in a box, keep it in the box to preserve its surface and stop it getting damaged by knocks or moisture.
In conclusion
This article on knife burrs and honing rods has hopefully informed you on getting the best out of your kitchen knives and keeping them beautifully sharp. Do explore other blog posts on this site for more information on knives and knife care. If you ever want to get your hands on some premium, handmade high-carbon knives, check out our collection!