Your favorite knife broke, and so did your heart. How are you going to prepare specialities without the go-to tool? Chances are, you might still be able to fix up the damage, most chipped blade can be saved at home!
Some knives require immense time and effort to fix them up, making it better to replace them altogether. Other times, fairly simple tools can breathe new life into your favorite cutleries. Read this how-to guide on broken knife fixes and see whether there are any chances of revival for your tool.
Here is a simple guide on how to fix a broken knife, we will talk more in detail below.
- Examine the type and severity of damage (knife edge or tip).
- Mark the blade with a Sharpie to form a new edge or tip.
- Use coarse and fine grit whetstones to repair the damage.
- Examine the repair and remove any burrs with a honing rod.
- Finally, polish and sharpen your knife.
Table of contents
How to fix a chipped blade
Cutting your way through hard items could make your blade chip or gouge along the way. This is especially true for knife steels that are harder.
Harder steels, even though known for their edge retention abilities, easier sharpening and lower weight, also have disadvantages. Such knives are likely low in toughness and have more sensitive blades that make them susceptible to chipping.
Gather the tools
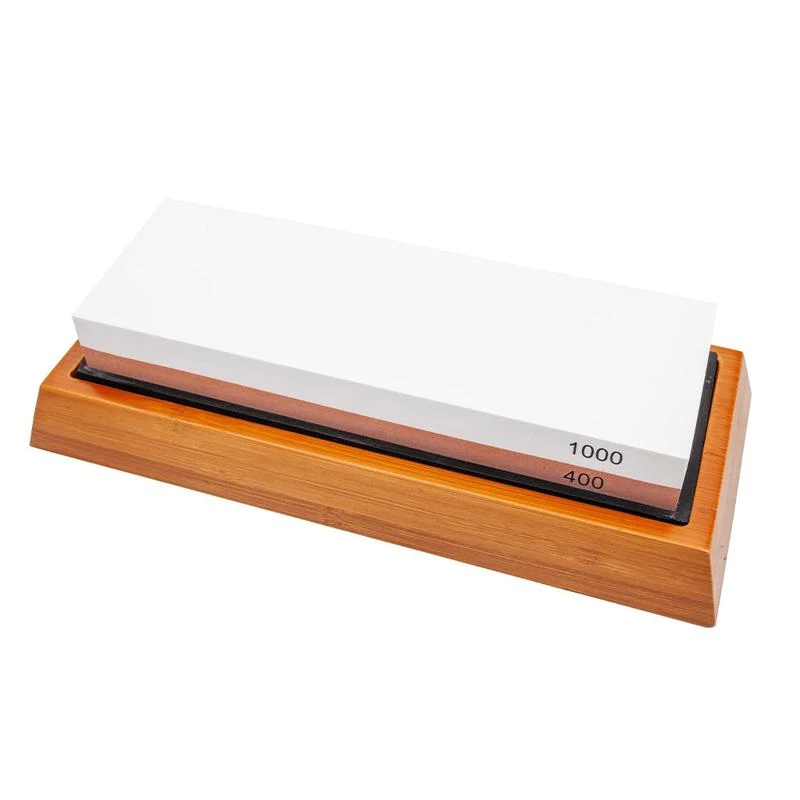
You will need coarse and fine whetstones, as well as a honing rod. A black Sharpie will also come in handy when marking your knife with a new edge. As for whetstones, you will be needing 400 or 600-grit whetstones for repairing the knife and higher grit whetstones such as 1000-grit for final repair touches.
Examine the severity of damage
To begin with the knife fix process, start by examining the extent of the damage. Is your blade chip localized to one area, or do the chips and cracks radiate towards the knife’s spine? Repairing your knife should mean getting rid of all such chips and cracks.
The severity of the damage would also determine your approach to the repair and which grit whetstones you will be using. If you believe that the repair is possible, go ahead. Otherwise, there is no point in initiating the knife fix.
Plan the repair
Next, to eliminate the chips from your knife’s edge, you can use a Sharpie to assess how much material you need to remove to eliminate the knife chips. These Sharpie markings will help you evaluate your progress and guide the knife fixing process.
Select the appropriate grit whetstone
How deep is the chip extending into the knife steel? The question is essential when repairing your knife as it will determine the grit of the whetstone that you will be using. Minor cuts require higher grit whetstones such as 600-grit to remove little material at the same angle as sharpening the knife.
For medium-sized chips, a 400-grit whetstone will do the job well by removing material faster for a quicker edge recovery. It would be best to do this at about a 25-30 degree angle. As for deeper chips, it’s better to use a 120-grit whetstone to remove material aggressively in less time. The angle that you will maintain while doing the repair will be the same as used when sharpening your knife. This angle to repair your knife is dependent on the knife type and the knife user’s needs.
Repair the blade edge
- For repairing the knife chips, start with a coarse whetstone. A 120 or 200-grit whetstone is an excellent place to begin to remove more material quickly in larger-sized chips. Do not use a higher grit whetstone in the initial stage as it won’t remove material quickly and you will eventually wear yourself out before completing the repair.
- Maintaining a consistent angle as used when sharpening, begin to move your knife across the whetstone from the heel to the knife tip.
- Make about 6-8 strokes on one side of the knife. Once done, repeat these strokes on the other side of the blade. Maintain the same angle at both sides of the knife.
Examine the repair
Now that you have used a coarse whetstone on your knife chip, the chips in the edge must have disappeared. Confirm this by examining your Sharpie markings. If there is still a lot of material to be removed, continue with the same whetstone. Otherwise, proceed to use a 400 or 600-grit whetstone.
After the chips have been removed, you are essentially sharpening the knife edge. Move up to higher grit whetstones with fewer strokes on each side for finishing.
Honing
Burrs will emerge on the knife once you are done with the repairing process. You can remove these burrs or bent edges on your knife by using a honing steel. Honing steel will make your knife sharper by knocking the bent knife edges back to their previous positions.
Simply use a honing rod and run your knife over the rod a few times to get rid of those burrs. Make sure to maintain the angle you hone your knife at, throughout the whole process.
Following the above steps will hopefully revive your chipped knife-edge so that you can make those perfect cuts once more!
Handpicked for you
True cutting power in the palm of your hand
How to fix a chipped knife tip

Another place that your knife may break is at the tip. This breakage happens when the knife tip gets stuck while cutting a tough ingredient and the body is bent away on one side or the other. You might have dropped it or done something that stressed the knife tip and made the tip chip off.
Gather the tools
The tools that you will be requiring for fixing your chipped knife tip are coarse and fine whetstone of 400-grit and 1000-grit, a honing rod, as well as a Sharpie.
Examine the damage
Check whether the broken knife tip has a bend near the break. Correct any warped steel during the knife fix, which will be explained later in the article.
Plan the repair
Once again, you must plan out the amount of material that you need to discard in order to reconstruct the tip of the knife blade—Mark out the part of the knife tip that needs to be removed using a Sharpie. One way of marking is to get rid of some parts of the cutting edges to re-shape the tip.
Another way of marking the knife tip is to remove steel from the knife’s spine towards the direction of the edge. This way is often the best to re-establish the edge. Cutting this way would get you a fine curve from the spine down to the tip.
Whichever suits best for your knife, make sure to make the shape markings with your Sharpie.
Repair the knife tip
- Secure your whetstone in a holder and begin by dragging the knife’s spine back and forth against the stone at high pressure.
- Maintain a steep angle of 45 degrees or more, perpendicular to the whetstone. A high sharpening angle is usually required as the knife needs a completely new tip.
- Nevertheless, any angle is suitable that eventually brings you to a new knife tip. For repairing the tip, the best way to remove steel is from the spine. This will allow you to have a curve from the spine to the tip.
- For creating this curved grind, simply move your knife handle back and forth and keep a check at regular intervals to ensure a smooth curve. Your focus should remain on the tip as you drag the spine back and forth to create the curved grind.
Examine the repair
Now that you are done with the main part, it’s time to examine how far you’ve come. Once your Sharpie markings have been achieved, move on to a finer whetstone of 1000-grit and slide the knife spine back and forth.
Honing
To remove the burrs, use a honing rod, maintaining a suitable angle (20 degrees for most western knives) throughout and running the rod gently along the edges to knock the edge back to their position.
Alas! You have successfully managed to repair your knife tip.
How to fix a bent blade
Most of the time, breaking your knife creates a warped/bent blade. This bend needs to be fixed alongside the knife tip fix for proper knife revival. Here is how:
Gather the tools
For fixing a bent knife blade, you will need a non-slip grip mat, latex gloves for extra grip, cut-resistant gloves for protection, and a black Sharpie.
Examine the bend
Lay your knife on the flat surface of any table. Make sure that your knife blade is on the table while the handle is off the table. This way, you will see which side of the knife blade is sticking up at the knife tip. Check both sides of the knife to see which area has a lift or gap from the table.
Mark the bend
Use a Sharpie to mark the area with the highest gap from the table. This mark will help you correct the bend and check whether it has been fixed.
Lifting technique
Although pushing the bent blade back to its prior position makes more sense, it actually isn’t. The truth is that pushing allows us to exert more force than may be required. As a result, the knife may bend on the opposite side.
Here is a short video on how to use the lifting technique for correcting knife bends:
- Lift the handle or the back of the knife to correct the bend.
- Place your knife on a grip mat. Put the palm of your hand on the Sharpie marking that you made earlier and position your dominant hand two or three inches below the marking. This positioning will allow you to concentrate your repair effort as close to the bent area as possible.
- Move your palm half inches above and below the Sharpie markings while you make gentle lifts with your dominant hand a few times.
- Remove the grip mat to examine how much the bend has been corrected. Make gentle lifts once more on the grip mat till the bent is gone.
- For bends closer to the knife tip, ensure that the knife is placed closer to the table’s edge for a more secure grip.
And with that, our warped blade is no longer warped.
How to polish (sharpen) your knife after repairing
Regardless of the size of the chip you were repairing, the final step involves using a high-grit whetstone to polish the final edge. A stone of 6000-grit or higher would work great to make the final touches for an edge repair. Simply move the blade across the stone at a 45-degree angle or steeper to achieve your desired look.
For knife tip repairs, use fine grits of sandpaper to rub your knife spine until the part of your knife repair section begins to look like the rest of the knife. A few passes with each grit of sandpaper will work fine.
How to take care of your knife
Even though knife repairs are possible, it is better to take care of your knife to avoid the time and effort spent in reviving them. Here are the things you can do to protect your knife blades:
- Hand-wash your knives and rinse them off quickly to avoid moisture build-up and chips from corrosion.
- Use proper knife storage solutions to avoid mishandling.
- Use proper knife sharpening techniques and tools. Hone and sharpen them regularly.
- Use your knives for the jobs they are meant to do. For instance, don’t use your vegetable knifeknife to cut through meat and bone.
- Use the right cutting boards.
In conclusion
Always go to a professional for help or simply replace a knife if the damage is too severe. In case there are no chances to salvage your old knives, you can always buy our hand-forged HDMD knives for exceptional performance at the best prices. Try them now!