Here at HDMD Knives we’re big into kitchen essentials – particularly those that help you look after your kitchenware. For most home cooks or professional chefs, knives, chopping blocks and cutting boards are everyday usage items and sadly, they sometimes don’t get the care and attention that they deserve.
We realize that you’ve spent good money on items like your knife set and your wooden chopping surfaces – so let’s look after that investment and give you a comprehensive guide on how to use food grade mineral oil in the kitchen to protect your tools!
Table of contents
What is mineral oil, and how do I know if it’s food grade?

Mineral oil is a light, colorless oil that has no odor. It’s a byproduct from the manufacturing of things like gasoline and petroleum products and the refining of crude oil.
All that sounds very industrial and mechanical, but mineral oil has a wide application of uses, and some of these are valuable to you in the kitchen. It’s also inexpensive, and we recommend buying a bulk size bottle that’ll last you, it works out much cheaper than buying it in small amounts.
Note: Never use vegetable, canola or olive oils in place of food grade mineral oil because they will go rancid over time. Only food grade mineral oil is stable enough to last without oxidizing and becoming unpleasant.
For kitchen use, you’re looking for FOOD GRADE mineral oil, not the type that’s used in machines. ‘Food Grade’ simply means the oil is non – toxic, highly refined, and safe for you. How do you tell the difference? Here’s a handy checklist:
- Check the label – the mineral oil bottle or container should have an NSF (National Sanitation Foundation) certification telling you that the ingredients are approved by the F.D.A and safe to use and consume. So, you’ll be checking for this label –
If the label on the product you’re buying isn’t clear about N.S.F or F.D.A certification, you’ll need to check with your retailer or supplier that it’s safe for kitchen use.
- Consider the source – never use mineral oil found in your garage or purchased from an industrial concern for your kitchen needs, it will be low grade and toxic. Rather, purchase a product specified clearly as ‘Food Grade’ from a kitchenware shop or drugstore.
- Confusingly, some mineral oils may be scented but still be classified as ‘Food Grade’, rather look out for the unscented type to avoid tainting your food. Your kitchen mineral oil should have no scent or taste for best results!
Where can I buy the food grade mineral oil?
Food grade mineral oil is commonly available for purchase at hardware stores, home improvement stores, and online platforms such as Walmart. These establishments typically carry products that cater to kitchen and household needs, including food grade mineral oil used for various purposes such as seasoning cutting boards or lubricating kitchen utensils.
The price range, depending on the capacity, is between 5 and 30 dollars.
Food grade mineral oil – what can I use it for?
Mineral oil was made for kitchen usage, it’s a wonder stuff for much of your equipment care needs. Let’s have a ‘look see’ at how to use it best!
Wooden cutting/chopping boards

Your hard-working wooden cutting boards in the kitchen need TLC, because they’re exposed to moisture, germs and nicks and cuts on the daily. This is where mineral oil comes in – it works to protect the condition of wood by repelling water and giving a conditioning coat.
Want a long-lasting chopping board that’ll withstand whatever you can throw at it? Food grade mineral oil is your bestie here and will keep your food prep boards looking like new and safe from warping and cracks. Here’s how to use –
‘Flood’ technique
This is as simple as it gets in terms of methodology.
- Take your clean and dry wooden board and place it on a firm surface/counter. Underneath it place either scrap fabric like old dishtowels or newspaper to discard later. These layers will absorb any drips or mess.
- Pour a generous amount of the mineral oil over the whole surface of the board and allow it to ‘sit’ overnight and soak up the oil. You should be using enough oil to cover the board’s surface, but it shouldn’t be so much that it’s running off the edges or puddling on the board.
- The next day use something like paper towels to wipe the board down thoroughly and remove any excess oil. Once the board is completely dry it’s ready to use!
‘Heat and treat’ technique
This method of cutting board protection is a bit more labor intensive but yields great results. Start with a clean and completely dry board.
- Firstly, heat ¼ cup of food grade mineral oil in a small pan until it’s body temperature, just slightly warmed. This thins the oil and makes it easier to spread.
- Now dip a clean cloth into the warmed oil, you’ll be using a bit at a time, and rub it into your board in the direction of the wood grain. Use enough oil so that you’re coating every part of the board, the edges and bottom side of it too. If your cutting board is brand new, repeat for 5 coats and give enough time between coats for the oil to soak into the wood.
- Once you’ve coated the board thoroughly, allow it to sit for an hour to soak up the mineral oil.
- Once dry, you can wipe off any excess oil with a clean dry cloth, then let the board sit again for 3 or 4 hours, this will give the oil coat time to harden and become a protective finish on the wood.
- Once the layer of oil has had time to harden, you can buff your board to a shine with a clean dry cloth, this will keep it looking good!
For optimal board maintenance it’s recommended that you ‘treat’ your wooden chopping/cutting boards 3 or 4 times a year.
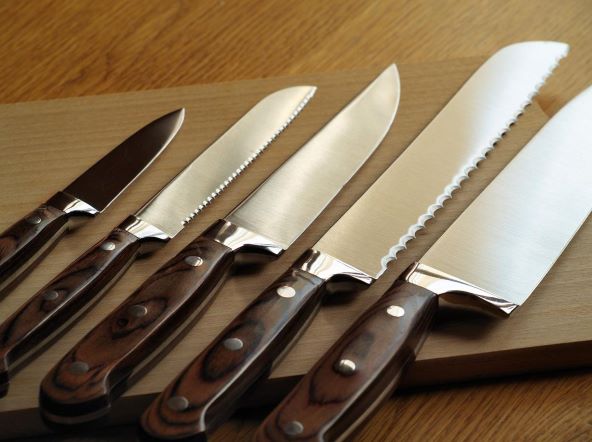
Knives
Food grade mineral oil is the ‘go to’ treatment product if you want to look after your good knives. Carbon steel bladed knives in particular benefit from mineral oil because the steel itself doesn’t contain elements that prevent corrosion.
Mineral oil has several benefits – it protects steel from rust (particularly if knives are being stored), it lubricates the blade, and it keeps the patina or ‘shine’ on your blades looking great.
It’s also the bomb on wooden or bamboo knife handles because it’s an oil that treats and protects whilst absorbing quickly – without leaving a sticky layer behind or imparting a rancid taste or smell to your food. The oil will saturate the handle, meaning that damaging moisture won’t be absorbed.
Pro – tip: Never soak knives in the sink because the handles will absorb water, this leads to damage. Good quality knives should also not be placed in the dishwasher but should be cleaned by hand.
So, mineral oil is great for knives, both the blades and the handles. Let’s look below at how to use it best!
Handpicked for you
True cutting power in the palm of your hand
Kitchen knife blades
To treat your knife blades and protect them from corrosion, a tiny bit of mineral oil will go a LONG way! For this reason, we recommend something like a syringe or an eye dropper to put just a drop of the oil on each side of your knife blade. The knife should be completely clean and dry before you start.
- Holding the knife by the handle securely, apply your miniscule drop of mineral oil and then buff it into and along the blade with either a clean, soft cloth or some paper towel.
- Once you’ve worked it into the metal all over, you can dry off any excess oil with a dry cloth or dry paper towel.
- Remember to also polish the other metal parts of the knife (like screws and fittings) with the oil to keep them rust protected too!
For knives that see regular use, or if you live in a humid climate, you’ll want to check your knife blades for rust monthly and treat accordingly with the mineral oil.
If you do see small amounts of rust many knife care kits come with a ‘rust eraser’ included that you can use to deal with it. Alternatively, rust erasers can be bought at any good kitchenware shop or hardware outlet, or you can take your knives to a professional knife sharpener for oiling, sharpening and rust removal.
Kitchen knife handles
Any appreciator of beauty or workmanship will recognize the craft and care that goes into making good quality wooden knife handles. Unfortunately, excess moisture or humidity can swell or crack your wooden handles, and this is a disaster for the knife lover!
For this reason, we want to give you the scoop on using mineral oil to seal and protect these beauties for long-lasting performance. Here’s what you need to know –
- Firstly, your knife including the handle should be clean and dry.
- Take a clean cloth or rag and soak it in food grade mineral oil. Then take a Ziploc bag and turn it inside out to use over your hand as a glove to hold the soaked rag. This will keep your hand protected from the oil.
- Next, wipe a liberal coat of the oil onto the knife handle all over, trying to work it into the wood. It’s important to try generating a little heat via your rubbing action – this will help the oil to penetrate the wood deeply and it’ll break down any wax layers that may be present and preventing the oil from seeping into the wood.
- As you finish one layer of the oil, set the knife aside for a couple of hours to absorb the oil. You can rest it on some rags or newspaper to prevent mess.
- Repeat this process a couple of times until the knife handle is no longer ‘taking’ or absorbing the mineral oil. This is how you’ll know that it’s fully treated.
You can also tell when the knife handle has had enough oil by looking at it. If it looks ‘wet’ and shiny after a good 10 minutes of rubbing, that means it has absorbed enough oil for the present and you can dry it off. On the other hand, if there are still dull or dry areas, you can continue adding more oil and rubbing further.
Holding the rag, pull the plastic bag up and over it when you’re done so that the rag is now inside the bag, and you can zip or seal it inside for future use. This is a handy way of preventing mess and you’ll always have an oil-soaked rag in your Ziploc bag in a cupboard or drawer, ready to go for knife treatments.
Knife handle soaking methods
If rubbing isn’t your thing and you’ve got a good quantity of food grade mineral oil to hand, you can try these 2 methods too:
- Stand your knife handle side down in a tall, thin glass and put enough mineral oil in the glass so that it covers the handle completely. Let it sit like that overnight, then remove the knife and dry it completely, rubbing it down with a cloth or paper towels to remove any excess oil. Discard the excess oil.
- Put a big piece of clingfilm down onto your kitchen counter and coat the center of the clingfilm with a thin layer of the mineral oil. Place your knife in the center of the clingfilm and wrap it up tight, so that it’s completely encased in the oily clingfilm. Leave overnight, and then remove from the clingfilm next day and dry off completely using either a cloth or paper towels.
Food-grade mineral oil, rust erasers and knife care kits can all be found online for purchase.

What alternatives do we have for lubricating knives and cutting boards?
Apart from food-grade mineral oil, there are several other oils that can be used to lubricate kitchen knives and cutting boards:
- Coconut Oil: Coconut oil has antibacterial and antifungal properties, which can effectively protect cutting boards and knives. Additionally, it is a natural food-grade oil that will not contaminate food.
- Linseed Oil (Flaxseed Oil): Linseed oil forms a hard protective layer after drying, making it very suitable for wooden cutting boards. It is also a natural food-grade oil.
In conclusion
HDMD Knives hopes that this article about mineral oil has opened your eyes to its potential as a kitchen tool protector and its worth as a kitchen staple investment. We look forward to seeing you again for even more exciting articles and resources that’ll have you getting the best out of your knives and your kitchen!